آموزشکده علم ایران

آموزشکده علم ایران

کمیاب ترین های برترین های دنیا
آموزشکده علم ایران

آموزشکده علم ایران

کمیاب ترین های برترین های دنیا

Shrimp and Grits

Shrimp and Grits

There is something deeply inviting about a dollop of fresh butter slowly melting on top of a warm bowl of grits. Indeed, magic can be found at the bottom of that bowl. For many of us who were raised in the south, grits are a reminder of home, of nourishing breakfasts that taught us to savor food, and of meals prepared with warmth and care. No matter your locale, a bowl of well-made grits is a comforting way to start the day, which is why this recipe for Shrimp and Grits seems especially fitting for Mother’s Day.

Beyond childhood breakfasts, grits have a long history of being prepared with soul. Hominy grits were developed by Native American tribes as a thick porridge from stone-milled corn. An offering of goodwill, this simple meal was shared with early colonists in Roanoke, North Carolina, and used to greet settlers of Jamestown, Virginia. Like masa harina, hominy grits underwent nixtamalization—they were softened, hulled, and then ground after being treated with an alkaline solution. Adopted by Southerners, grits were cheap and readily available, a tasty way of feeding hungry communities. The roots of shrimp and grits can be traced to the coast’s low country, where fishermen added freshly caught shrimp to create a humble, yet satisfying breakfast.

MEAT01_prawns_IMG_1703

You can make grits from course-ground cornmeal from nearly any variety: white, yellow, and blue. The kind of corn and size of the grind affect the cooking time and the amount of water needed. Traditional methods of making good grits require attention—left unattended, the cooking corn meal will stick to the pot and develop lumps. Instant grits offer shorter cooking times but at the cost of blander flavors. Instead, use a pressure cooker and enjoy the real thing, quickly and without constant stirring.

Regional and subregional variations on this dish are abundant. We intensified our Shrimp and Grits by cooking course-ground grits in Pressure-Cooked Crustacean Stock, and the addition of Redeye Gravy adds even more flavor. The soft-cooked egg seems to melt over the finished bowl of warm grits. For a more traditional take, add prawns that have been seared or cooked sous vide.

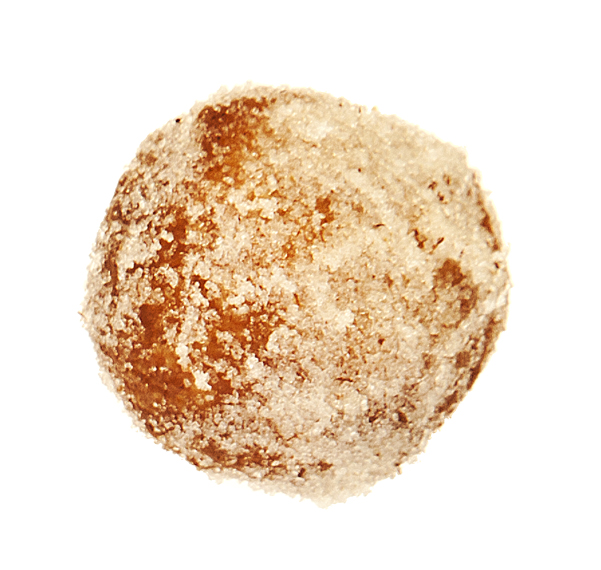
Save room for something sweet: Cinnamon-Sugar Doughnut Holes pair well with morning coffee and are the perfect way to end an incredible tribute to the mothers in our lives.

Final Plate ups

Shrimp and Grits_MCAHCinnamon-Sugar Doughnut Holes_MCAH

Step 2 cook sous vide

Cook the eggs sous vide in their shells for 45 minutes. This yields poached eggs with a delicate, creamy texture. You can proceed with steps 3–9 while the eggs cook.

MCAH_GRITS_Grits_Step4_MG_5091

Place a metal rack or trivet in the base of a pressure cooker, add water to a depth of 2.5 cm / 1 in, and then place the filled jars on the trivet.

Sugar Balls

Cinnamon-Sugar Doughnut Holes. Leftover dough can be used to make our Neapolitan-Style Pizza Dough or freeze for up to 3 months.

Not Enough Flour

The finished dough should pull away from the sides, not the bottom, of the mixing bowl.

Tips & Substitutions

For the grits:
  • Cooking eggs sous vide for 2 minutes will yield a delicate, creamy texture. You can proceed with steps 3–9 while the eggs cook.
  • Always leave at least 1.3 cm / ½ in of headspace in canning jars when used in a pressure cooker. The jars should also never touch the bottom of the cooker. Set them on a metal rack or trivet—or, in a pinch, on crumpled sheets of aluminum foil. Add enough water to cover the rack so that the pressure cooker can build up steam.
  • Unscrewing canning lids by one-quarter turn is an essential step because it prevents pressure from building up in the jars, which may crack or blow their lids off while inside the cooker.
  • Start timing as soon as the cooker reaches your target gauge pressure. If your cooker has a spring-loaded pressure valve, the valve should pop up just to the line but not beyond it. The cooker should not hiss loudly. If you have a jiggling-weight pressure valve, the weight should move 3–5 times per minute; it shouldn’t dance around wildly.
  • The stock can be frozen for later use. Vacuum seal it with the grits in a bag rated for the higher temperatures of a pressure cooker.
  • If you decide to vacuum seal the grits in a bag, adjust your cook time in step 5. Grits will cook about 15 minutes faster this way.
  • Use canning tongs to remove your jars from the cooker, and let the contents cool slightly before opening them.
  • Be gentle as you peel your soft-cooked egg. Shelling can be greatly improved by making the eggshell brittle while firming up the egg white. Use either high heat from a blowtorch. If you decide to use a blowtorch, heat your egg for about 2 minutes and rotate it constantly while flashing it with the torch to thoroughly dry and heat the shell.
  • After using a canning jar for pressure-cooking, inspect the glass for cracks before using it again.
  • For a more traditional take on this dish, top your grits with prawns that have been seared or cooked sous vide.
  • Substitute milk, water, chicken stock, or vegetable stock for the crustacean stock.
  • You can find the full variation for our Cheese Grits in Chapter 21 of Modernist Cuisine at Home.
  • The Redeye Gravy and Pressure-Cooked Crustacean Stock are included in our Basics Chapter, available for download on Inkling.com
For the doughnuts:
  • Our Cinnamon-Sugar Doughnut Holes are a variation of our Neapolitan Pizza Dough—retain extra dough from your pizza for use in this recipe.
  • This recipe will yield 800 g of dough. Halve the recipe for a smaller batch.
  • Allow your dough to rest between kneads—relaxed gluten creates especially smooth, stretchy dough.
  • As you mix your dough, note the sides and bottom of the mixing bowl. As the dough comes together, it should pull away from the sides but not from the bottom of the mixing bowl. If the dough clings to the bowl's sides, sprinkle a teaspoon of flour on top and continue mixing. Repeat as needed until the sides of the bowl are clean.
  • You can also knead the dough by hand. Use a wooden spoon to mix the ingredients together. Then knead the dough on a cool steel or marble surface (if possible) for about 7–8 minutes. The dough will stick to your hands, but try not to add extra flour. Let the dough rest for 10 minutes, and then continue kneading for another 7–8 minutes. It should feel springy and smooth. If it is still sticky, sprinkle on top a teaspoon of flour and fully incorporate it.

Pressure-Cooked Fresh-Corn Tamales

Pressure-Cooked Fresh-Corn Tamales

Tamales are a true comfort food. Warm pillows of ground cornmeal surround both sweet and savory fillings. The dough of these steamed bundles is made from course-ground corn flour called masa harina. Inside, a bounty of different fillings can be found: cheeses, pork, chilies, cinnamon and raisins, and roasted vegetables.

The corn husks of tamales hide another secret: science. To make masa harina, corn is boiled and then steeped in lime water, an alkaline solution, in a process called nixtamalization (from the Aztec word nixtamal). The etymology of this word reflects the ancient roots of the process, which developed across Mesoamerica over 3,000 ago. The earliest evidence of the process was discovered in Guatemala and dates back to around 1,500 BCE.

The development of nixtamalization made corn a viable ingredient for cultures throughout the Americas. The process makes it easier for humans to digest corn and extract nutrients, particularly niacin. The alkaline lime water breaks down the kernel’s cell walls, making nutrients accessible. The reaction also intensifies the cornmeal’s flavor, giving it a distinctive roasted taste.

For many tamale recipes the filling is the star; however the focus of this recipe is corn. Our fresh-corn tamales are more like a delicate steamed cornbread, good enough to eat alone. We think they make a marvelous side dish, however you can easily turn them into an entrée with fillings of shredded meat, like carnitas.

Adapted from Modernist Cuisine at Home

Fresh corn tamels final

Tamale_MCAH_recipe

Step 6 batter in husk

Place a dollop of batter into the natural curl of the corn husk to enclose the batter.

Step 6 batter in husk

Fold the top of the husk down to seal the package.

Step 6 batter in husk

Tie your tamale with a narrow strip of corn husk or a piece of string, if necessary.

Tips & Substitutions:

For the Tamales:
  • After gradually adding and alternating your ingredients in step 3, test your batter to make sure it’s properly whipped. Drop a dollop into a glass of water—it should float.
  • Corn husks naturally form a cup shape. Troubleshoot tamale construction in step 6 by placing the batter in this cup, using the husk’s natural curl to enclose the batter, and then fold the top of the husk down to seal the package. Tie the tamale closed with a narrow strip of husk or piece of string, if necessary.
  • Removing a pressure cooker’s lid while its contents are hot can splatter boiling water or food all over the kitchen—or you. Before opening the cooker, let it cool, or run tepid water over the rim, to depressurize it. The pressure valve will sink down fully when the cooker is safe to open.
  • Reheat your tamales by steaming them. Alternatively, microwave a few tamales at a time on high power for 1–2 minutes.
Variations:
  • To make these tamales into more of an entrée, substitute the fresh-corn batter with carnitas, short ribs (page 221), or adobo (page 224). Experiment with non-traditional fillings like vegetables or grated Cortija, ricotta, or white cheddar cheese for even more variations.
  • Add even more flavor to your tamales by substituting rendered pork, bacon, or chicken fat for lard.
  • We like to garnish our tamales with pickled chilies and Salsa Verde (page 111), or use your favorite store-bought salsa.
  • Leftover tamale batter keeps on giving. Follow steps 2-5 of this recipe, then deep-fry small (15 g/ 1Tbsp) balls of the batter in 175 ˚F/ 350 ˚C neutral frying oil until they turn brown and crispy, 3-4 minutes. Try lightening up the hush puppy batter by whipping 108 g/ ½ cup of egg whites, and then stirring them in after step 5. For an extra-crunchy crust and an extra burst of corn flavor, grind freeze-dried corn into a powder, and then roll the batter in it before frying.
  • The recipe for Toasted Corn Stock can be found in the Basics Chapter of our App.
  • Download the entirety of Chapter 21 for $4.99 on inkling.com.

Pressure-Rendered Chicken Fat

Pressure-Rendered Chicken Fat

A recipe for fat may strike some as strange, but fat is one of the key flavor elements in food. French cuisine would be unrecognizable without cream and butter. Indian cuisine relies heavily on ghee (clarified butter). Chefs in Mediterranean countries turn habitually to olive oil, while those in Tibet always have yak butter on hand. The recipe here is for rendered chicken fat, which is widely used in Ashkenazi Jewish cuisine. (The Yiddish word for it—schmaltz—has taken on a whole other connotation in American English.)

As much as we love cream, butter, and olive oil, rendered fat is sometimes a better choice for use in a sauce or as a complement to meats because it does not distract from the flavor of the other ingredients. We use our Modernist schmaltz to enrich chicken sauce, salad dressing, and garlic, but it has innumerable applications—you can even use it to fry eggs!

Buy chicken skin from your butcher, or collect scraps of fat and skin from other chicken recipes in the freezer until you have enough to render. Note that the same technique can be used for any animal fat, including turkey, duck, or goose skin, and fatty trimmings from cuts of pork, veal, or beef.

– Adapted from Modernist Cuisine at Home

MCAH Pressure-rendered chicken fat

Step 1 divide and seal

In step 1, combine, and divide equally into two 500 mL / 16 oz canning jars.

Step 3 pressure cook

Tighten the lids fully, and then unscrew them one-quarter turn so that they do not explode.

Tips & Substitutions

  • We use canning jars inside the pressure cooker because it simplifies cleanup, and we aren’t usually rendering more fat than will fit in a couple jars. But you can render a large batch by putting 2.5 cm / 1 in of water in the pressure cooker, and then adding the ground skin. The pressure cooker should be no more than two-thirds full.
  • Removing a pressure cooker’s lid while its contents are hot can splatter boiling water or food all over the kitchen—or you. Before opening the cooker, let it cool, or run tepid water over the rim, to depressurize it. The pressure valve will sink down fully when the cooker is safe to open.
  • For Passover, you can substitute schmaltz for oil in matzo ball recipes, use it to make matzo brei, and add it to your chicken soup to enhance flavor.

 Variations:

  • To wet render, drop the skin or fat into boiling water, and reduce it until all that is left are pieces of meat and tissue floating in bubbling fat. Strain. Discard the solids. Allow the liquid to separate, and then pour the warm fat off the top.
  • To dry render, sauté the skin or fat over low heat until the fat melts. The cooking causes Maillard reactions that enhance the flavor of the rendered fat. Dry-rendered fat keeps for several weeks in the refrigerator. This method works particularly well with fatty bacon.


Caramelized Pumpkin Pie

Caramelized Pumpkin Pie

Pumpkin pie is one of the most popular Thanksgiving desserts; therefore we devoted some time to analyzing what makes this pie so easy to identify. It’s typically the spices you taste, not the pumpkin, so we came up with a way to extract the true taste of pumpkin while skipping the spices, at least in the custard itself.

Blog_Pumpkin Pie_205152

We decided to source one of our own recipes from Modernist Cuisine, wherein we pressure-cook carrots with baking soda. Baking soda deepens flavors and enhances caramelization of sugars, which, we concluded, would be the perfect way to accentuate the pumpkin’s essence. But it required finding the best pumpkin for the job. We settled on a type of pumpkin that comes in the shape of a can—it’s soft inside and practically pureed, with a label that says “Libby’s.” For pumpkin-flavored pumpkin, it’s our first choice.

—Francisco Migoya, Head Chef

2014-11-11-Pie-Blog20488_forEVER

Pumpkin Pie Recipe

Blog_Pumpkin Pie_201572

Step 3: The dough should form unevenly-sized chunks, known as a shaggy mass.

Blog_Pumpkin Pie_201982

Step 6: After rolling dough into a thin disc, fold it in thirds.

Blog_Pumpkin Pie_202042

Step 6: Rotate dough 90 degrees, roll it gently, and fold it in thirds again to create a square mass.

Blog_Pumpkin Pie_203582

Step 8: As you line your pie tin with dough, press firmly against all surfaces of the tin, making sure that the edge between the bottom and side of the tin is covered.

Blog_Pumpkin Pie_203632

Step 8: We use a paring knife to tightly trim off excess pie dough.

Blog_Pumpkin Pie_203692

Step 8: To crimp, pinch the dough between your index finder and thumb, gently applying pressure.

Blog_Pumpkin Pie_202102

Step 11: We’ve found that can openers are best for opening Libby’s pumpkin puree.

Tips & Substitutions

Make in Advance:

  • The dough can be made six weeks ahead of time and then frozen until needed. The filling can be made up to four days in advance and refrigerated until needed. We recommend assembling your pie the morning of your dinner so that it has time to cool and set completely.


For the Dough:

  • Keep your ingredients, dough paddle, and mixing bowl cold for as long as possible. We keep our cubed butter and water refrigerated, and we store our flour (packaged in a zip-top bag), dough paddle, and mixing bowl in the freezer until we are ready to begin the dough.
  • In step 2, the butter cubes should be thoroughly coated in flour. The coating prevents the development of a mealy dough texture and the butter from clumping together in step 4.
  • Over-mixing the ingredients can affect your results when your pie bakes. In step 2, the butter and flour should be mixed until the butter is about the size of a chickpea. After adding the water in step 3, mix the dough until the flour is no longer visible, but before a solid mass of dough has formed around the paddle. The dough should form unevenly-sized chunks, known as a shaggy mass.
  • After removing the dough from the mixer in step 5, we recommend compressing the dough by hand into two discs to prevent over mixing. Look for large pieces of butter in your dough—those chunks are the key to a flaky crust.
  • The technique in Step 6 is similar to laminating croissant dough. The folds create flaky layers when the pie bakes.
  • Before lining your pie pan with dough, give the dough about 20 minutes to relax. It’s an extra step, but we find that the additional time prevents the dough from shrinking as you press it into the pie pan.
  • We like to transfer our relaxed dough into the pie pan by lightly folding the dough into fourths, so that the shape resembles a flat ice-cream cone. The shape makes thin doughs easier to manage.
  • To crimp your crust, pinch the dough between your index finger and thumb, gently applying pressure to create divots. You can also use the tip of a fork to create a crimp pattern.
  • Don’t throw away the excess pie trimmings! Toss your scraps in cinnamon and sugar, and then bake them in the oven next to your pie. The trimmings will puff up, similar to pastries, and are the perfect size for snacking.


For the Whipped Crème Fraîche:

  • If possible, use a cake stand that spins. As you pipe the whipped crème fraîche, keep the bag still and spin just the stand, working in a spiral from the inside out.


For the Assembly:

  • For the egg wash, combine one egg, one egg yolk, a splash of milk, and a pinch of salt in a small bowl. We recommend using baking stones to bake pies. Stones provide better heat distribution, which will prevent the middle of the pie shell from becoming soggy.
  • Keep an eye on your pie as it bakes—there are two visual cues that indicate when the pie is done. When your timer goes off, open your oven, don your kitchen mitts, and give the pan a nudge. As you move the pan, the finished pie should demonstrate what head chef Francisco Migoya calls a “gelatinous jiggle.” The middle of the pie should gently bounce up and down while the perimeter of the filling remains motionless. If you nudge the pie and the filling ripples, or still resembles a liquid, it needs more time.
  • The pie filling will also develop a slight dome shape when it’s ready, similar to a soufflé. Once you remove the pie from the oven, the dome will fall.

Pressure-Cooked Chicharrón

Pressure-Cooked Chicharrón

It’s hard to miss the fanfare (or better yet, 12th-manfare) around Seattle right now—the Space Needle glows green at night and enormous 12s can be spotted along the skylines of Seattle and Bellevue, just across Lake Washington. Whether you’re a fan of the Seahawks, Patriots, or the commercials (or biding your time until next year), there’s one thing we can all get excited about: game day snacks. This year, we’re honoring the old pigskin with . . . pig skin. Pressure-Cooked Chicharrón to be exact.

Step 5 deep fry

Chicharrón is pork skin that has been dehydrated, fried, and puffed into crackling. It’s an addictive snack or garnish: make plenty, or it might disappear before it gets to the table. Pork skin is available from many butchers and at many Asian and Latin American markets.

The key to good chicharrón is drying the skin by just the right amount before frying it. The dried pieces should at that point flex slightly, and then snap in half. If they are too moist or too dry, they will not puff properly in the hot oil. Proper inflation is essential to good chicharrón. A food dehydrator is the best tool for drying the skin, but if you don’t have one, preheat the oven to its lowest temperature setting, arrange the pieces on a rack set over a baking sheet, and dry them for 8–10 hours until they become leathery and flexible.

Crispy Pork Chicharron Final

We like chicharrón with guacamole and salsa; however, if you truly want to win your Super Bowl party, make campechanas: tacos of corn tortillas filled with equal parts carnitas and chicharrón, topped with your favorite green chili salsa.

– Adapted from Modernist Cuisine at Home

Pressure-Cooked Chicharron

Step 1 remove fat

For step 4, use a butter knife to gently scrape the fat from the cooled skin.

Step 2 dehydrate

If you’re drying the skin without a dehydrator, preheat your oven to the lowest setting, arrange pieces on a baking sheet, and dry until they become leathery and flexible, 8-10 hours.

Tips & Substitutions

  • In step 4, use a butter knife or other utensil to gently scrape the fat from the cooled skin. Take care not to tear the skin.
  • When choosing a neutral oil, choose one that has a smoke point higher than the desired cooking temperature. Peanut, soybean, and sunflower oils are our favorites for frying at high temperatures.
  • Deep-fry food in enough oil that the food floats and does not touch the bottom of the pan.
  • For step 8, deep-fry the skin a few pieces at a time. Work in batches as needed.
  • Make it a feast. Check out our recipes for Pressure-Cooked Carnitas, Modernist Seven Layer Dip, Melty Queso Dip, and Pressure-Cooked Fresh-Corn Tamales.